This can be easily done without any software and by using command prompt administrator.
|
|
|
Steps To Create WIFI Hotspot Using Ethernet
- First of all log on to your computer as administrative privileges. Then Click Start.
- In the Start Search box, type cmd, and then press right click to click run as administrator or CTRL+SHIFT+ENTER to run command prompt as administrator.
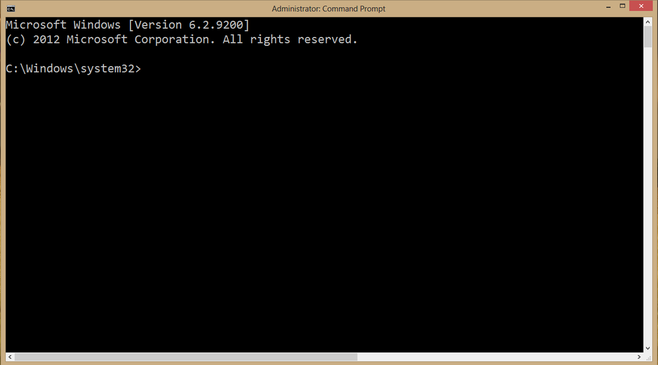
- If the User Account Control dialog box appears, then click Yes to open command prompt as follows.
- In command prompt enter the following command
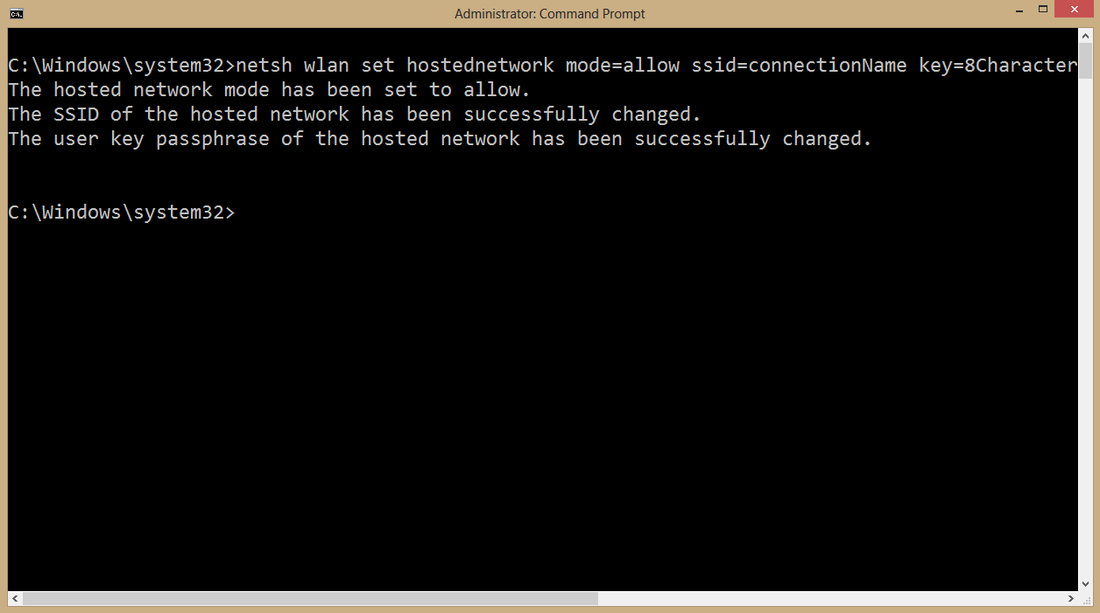
- netsh wlan set hostednetwork mode=allow ssid=ConnectionName key=8Characters
- Here don't forget to change ssid and key. Once the above command is entered following confirmation will be shown.
- Now to start the hosted network enter the shown below command
- netsh wlan start hostednetwork
- By this your wifi will be started and you can now connect to it.
- After gets connected, if the created wifi is showing limited access or no access then follow the steps to configure it.
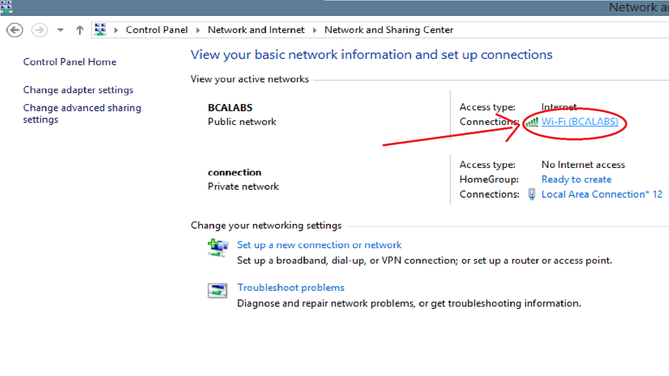
- Open control panel and go to Network & Sharing Center. There you will find two connected networks 1) Local Area Network 2) Your WIFI Hotspot
- In network and sharing centre, click on the network that you want to share through WIFI Hotspot (usually it will be your LAN network).
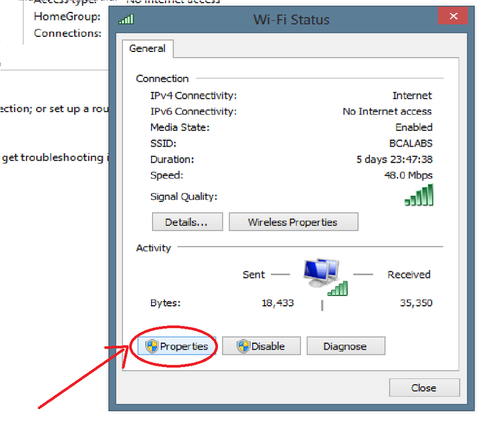
- After that you will get one network status window. Click on the properties button.
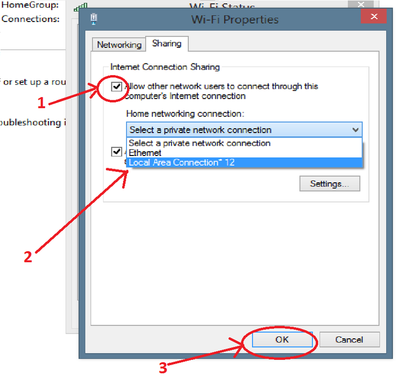
- In network properties, click on sharing button -> tick on allow other network users to connect through this computer's local network -> select the just created network - > click on the Ok button.
- And you are all done!!. You can find that your wifi hotspot is active and can be utilised where ever necessary.
- For any queries and problems regarding installation, please use the comment section below to post your question or problem and get the solutions as soon as possible.

