Want to send photos to people? Don't just send a stack of static photo files but share them in style by creating a slide-show in Flash. Creating a slide show in Flash is a complicated job. But don’t worry, you can follow the steps below and create slide show easily...

Slide shows are a great way to introduce a website visitor to what your company is about or to impress someone with your presentations. You can even add music or some interactivity by adding buttons to your slideshow. Many video editing programs allow you to create slideshows quite easily when compared to Adobe Flash. But creating yourself will make your presentation look good. So just follow these steps below to create a slideshow using Adobe Flash.
|
|
|
Requirements:
- A Computer with Internet
- Photos
- Adobe Flash CS4 or Higher
Steps On How To Create Slide-Show In Adobe Flash
Step 1: Create New Flash Document
In Adobe Flash, select 'Flash File Actionscript 3.0' from the Create New menu.

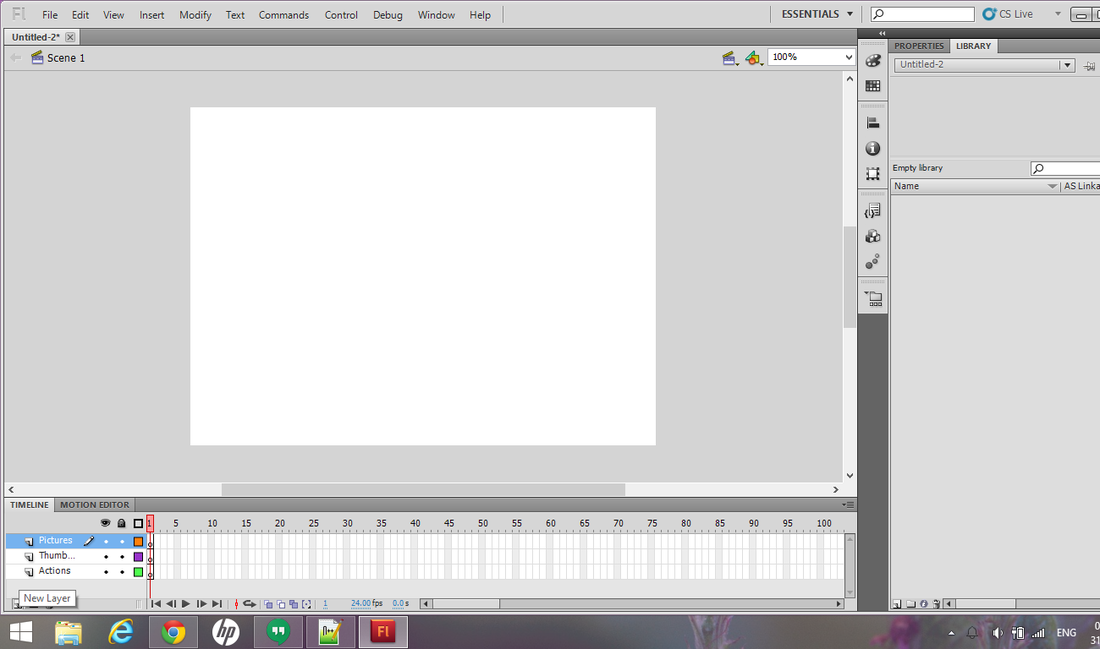
Step 2: Create Layers
From the timeline panel, click the 'New Layer' button until you have three layers. Double-click on each layer to rename it. Starting from the bottom, name the layers as Actions, Thumbnails, and Pictures.

|
|
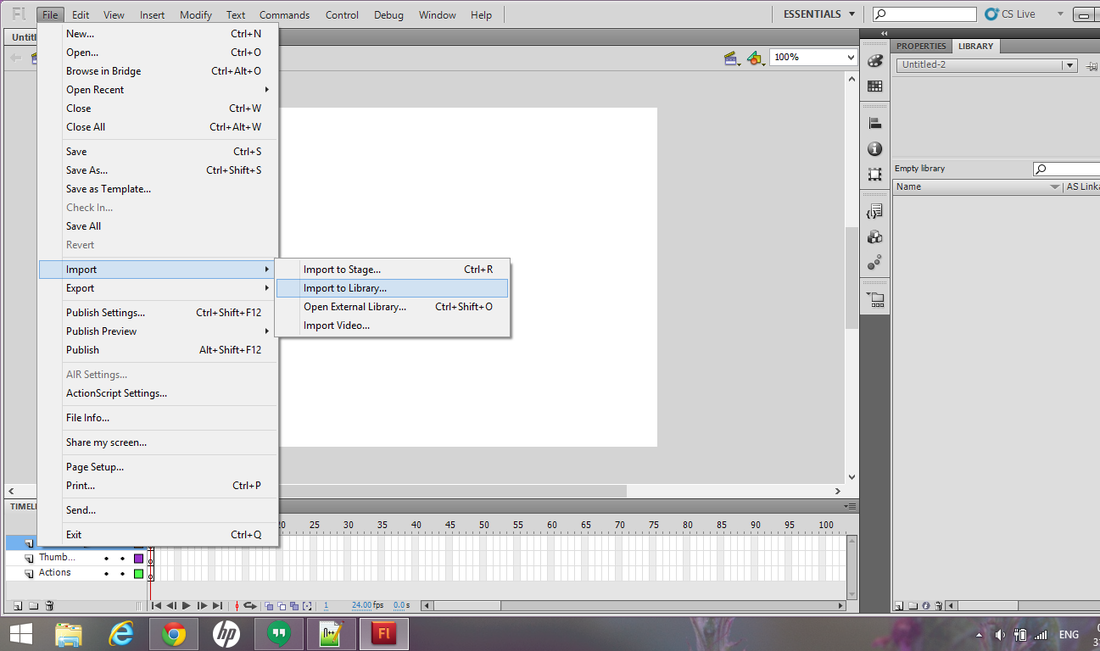
Step 3: Import Pictures
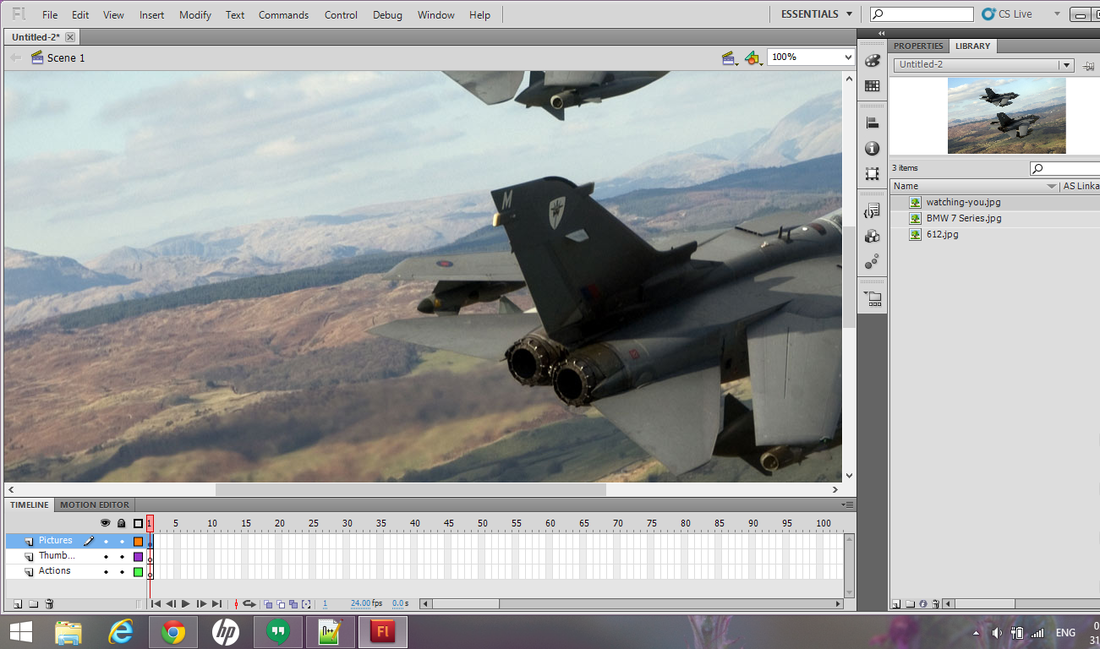
Import your pictures by going to File->Import->Import to Library. Browse the pictures you want to import. You can select multiple pictures by holding down the Control key and clicking multiple images
|
|
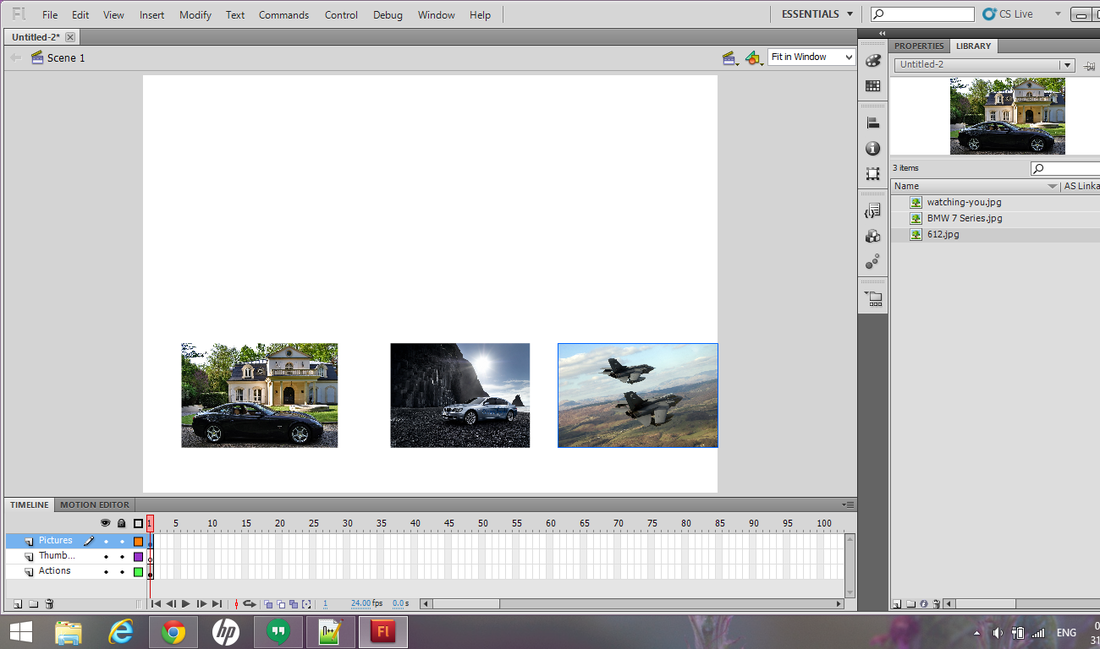
Step 4: Create Thumbnail Menu
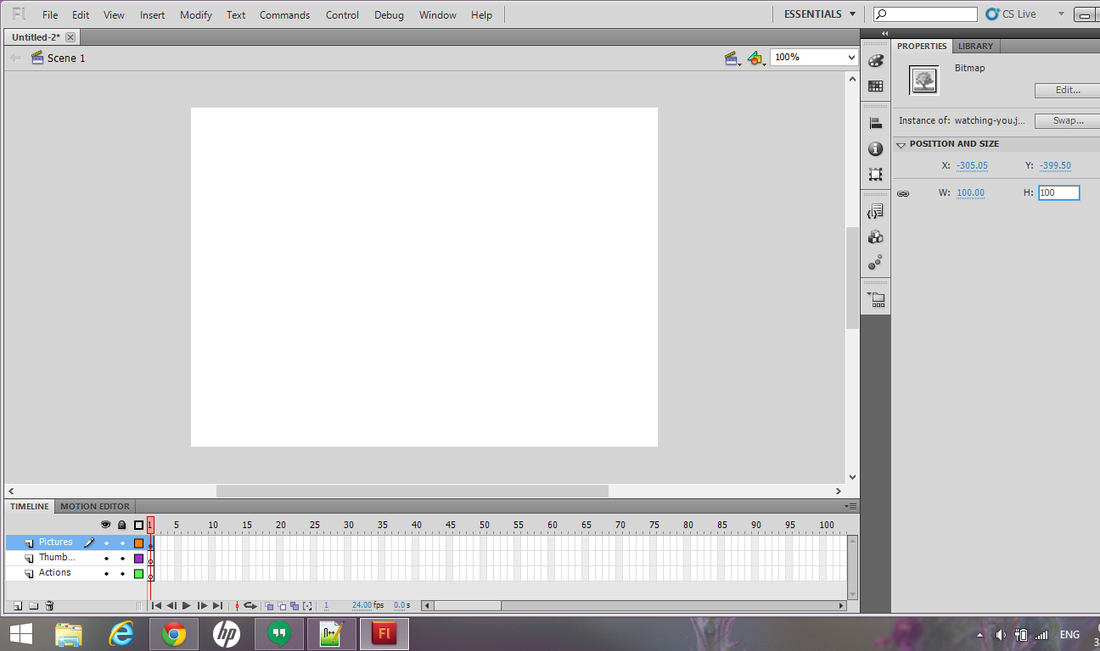
With the Thumbnails layer selected in the timeline, drag one of the imported images onto the document. In Properties, click on the chain-link icon and resize them both width & height to 100. Position the image at the bottom left of the document. Repeat this process for the remaining images so that they are in a row at the bottom of the document.
|
|
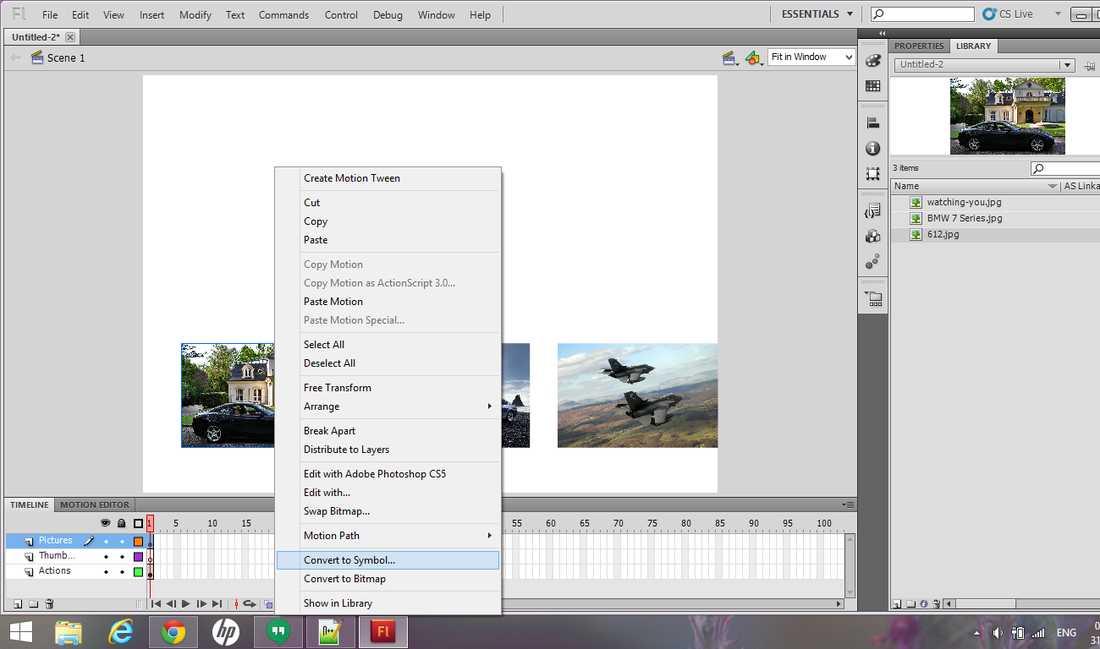
Step 5: Convert Menu To Buttons
Select the First Image->Right Click->Convert To Symbol and Change the name to ‘btn1,’ change the type to "button," and click OK. In the Properties panel, change the instance name to "button1." Select the next image from the menu and repeat the process, naming it "btn2" and "button2." Continue the process for each menu item.
Step 6: Create Photo Display
From the timeline, select the first frame of the Pictures layer. In Properties, change the name of this frame to ‘pic1.’ Drag the image corresponding with the first menu item onto the stage. Resize its width & height in the Properties panel. Move the image to the center of the document above the menu.
|
|
|
Step 7: Insert Frame & Add Images
In the timeline, Right Click on the second frame of the Thumbnails layer and select ‘Insert Frame.’ After this, Right-click on the second frame of the Pictures layer and select 'Insert BLANK keyframe.' In Properties, change the name of this frame to 'pic2.'Now drag the next image onto the document, resizing and centering it above the menu. Repeat this process for the remaining images.

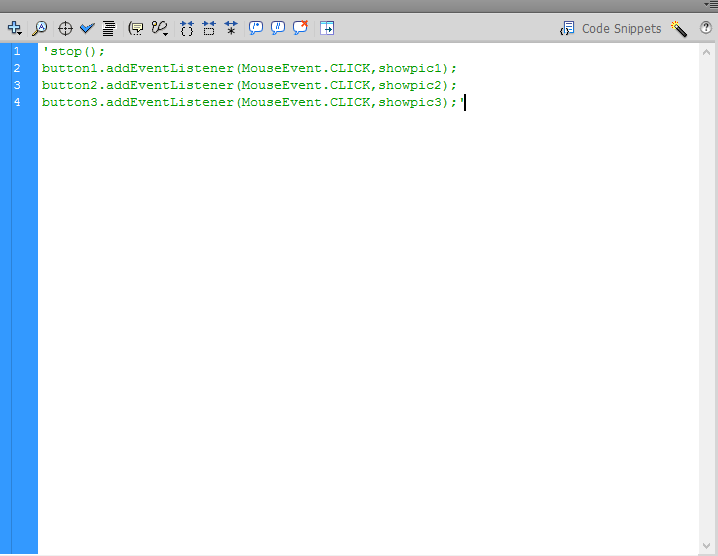
Step 8: Write Script & Add Functions To It
In the timeline, select the first frame of the Actions layer, Right Click->Actions panel. On the first line, type the stop function to stop the pages from cycling through. Hit Enter. Now add this code below to the Script.
stop();
button1.addEventListener(MouseEvent.CLICK,showpic1);
button2.addEventListener(MouseEvent.CLICK,showpic2);
button3.addEventListener(MouseEvent.CLICK,showpic3);'
function showpic1(Event:MouseEvent):void{
gotoAndStop("pic1");
}
function showpic2(Event:MouseEvent):void{
gotoAndStop("pic2");
}
function showpic3(Event:MouseEvent):void{
gotoAndStop("pic3");
}''
|

|
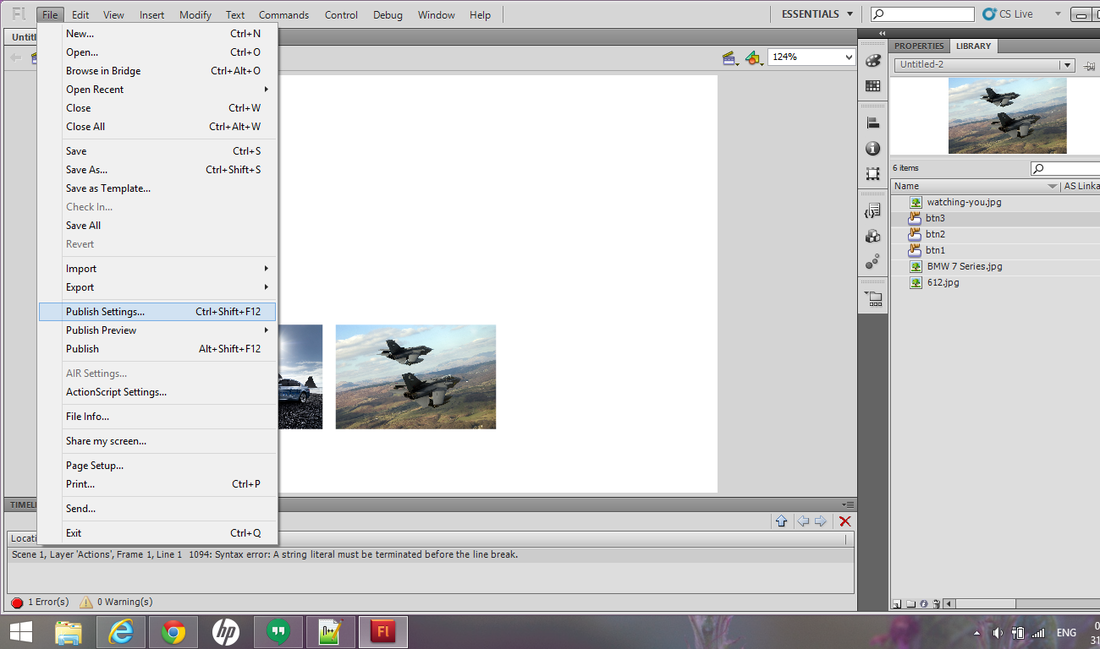
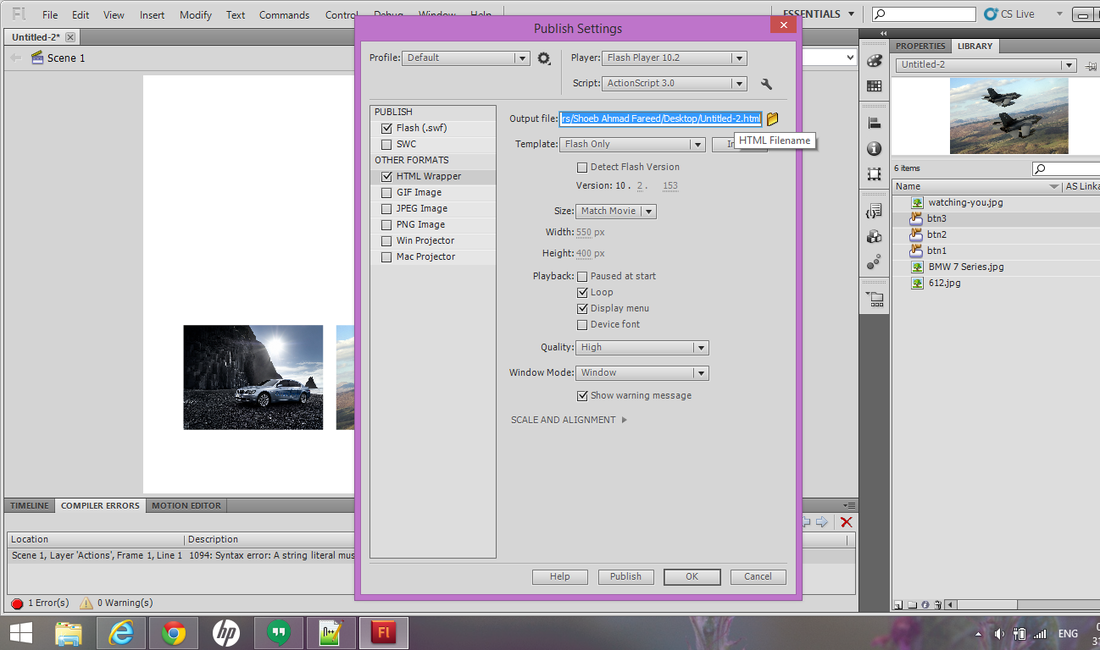
Step 9: Publish & Upload
Publish by going to File->Publish Settings. Check both the SWF and HTML boxes. Rename both files and select a location to save. Now click publish, and upload all of the published files to your web server. To access the flash page, navigate to the HTML file on your web server.
|
|
Author : Syed Mohammed Ameen

Designation: Associate Blogger
Bio: I am a computer science engineer who believes that there is no substitute to hard work, I am a technology freak and currently a Blogger at Techies Net.
Bio: I am a computer science engineer who believes that there is no substitute to hard work, I am a technology freak and currently a Blogger at Techies Net.