- Social Networks engagement
- Newsletter
- Push Notifications
One specific category in Push Notifications are Desktop Notifications or you can say it as Browser notifications. This feature helps users to subscribe for newsletter and get notified whenever a new post is published.
|
|
|
Here we go,
Steps to Enable Desktop Notifications in WordPress Website
- Open your WordPress Admin Dashboard
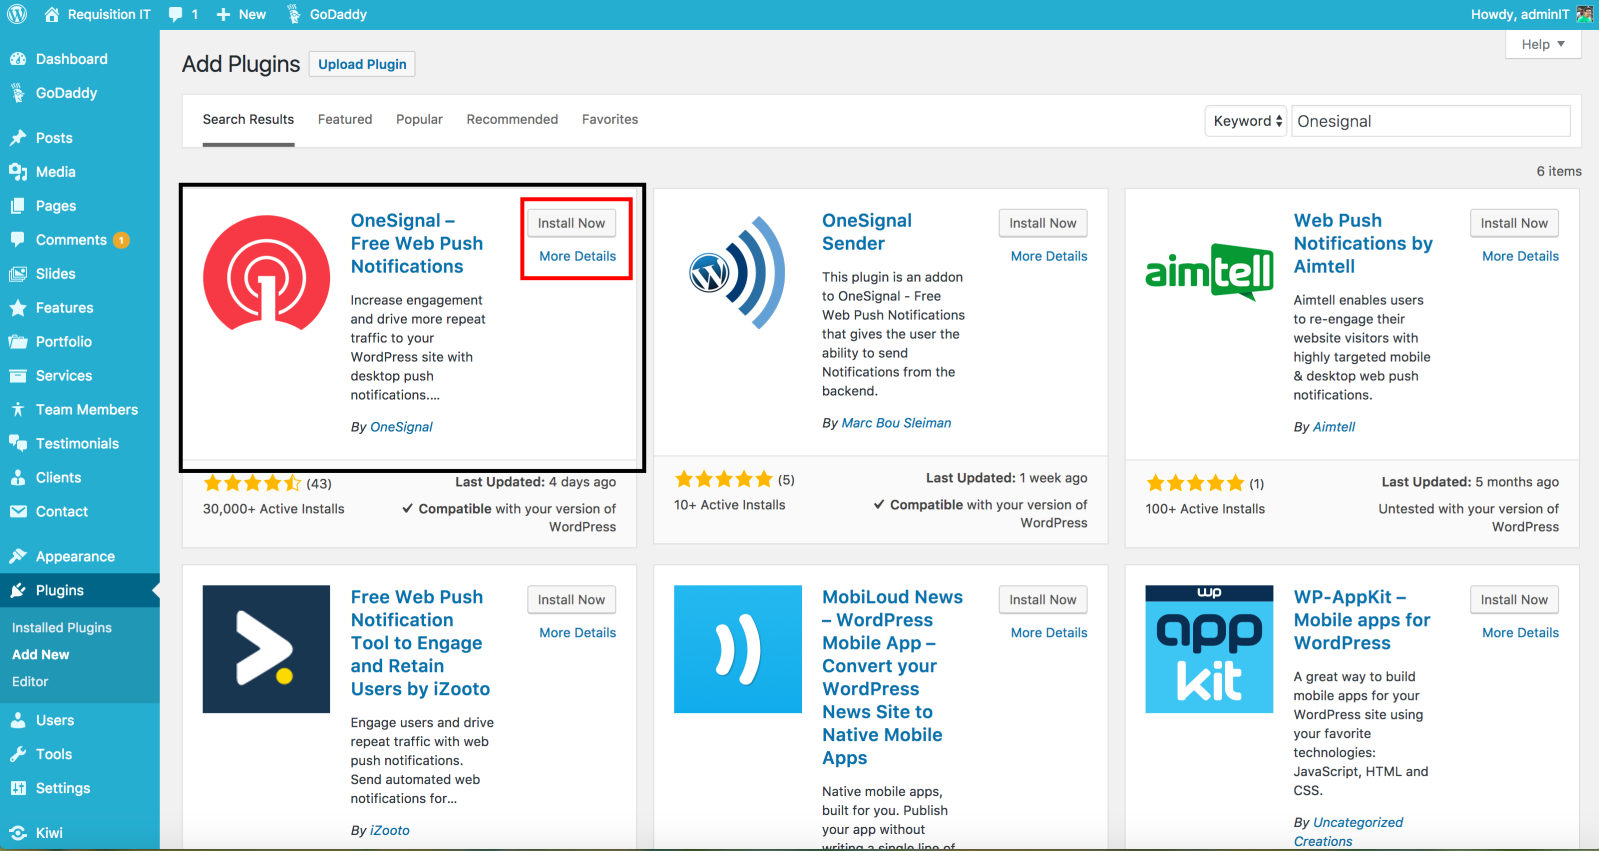
- Navigate to Plugins >> Add New
- Search for “One Signal” and click on “Install Now”
- After the installation, tap on “Activate Now”
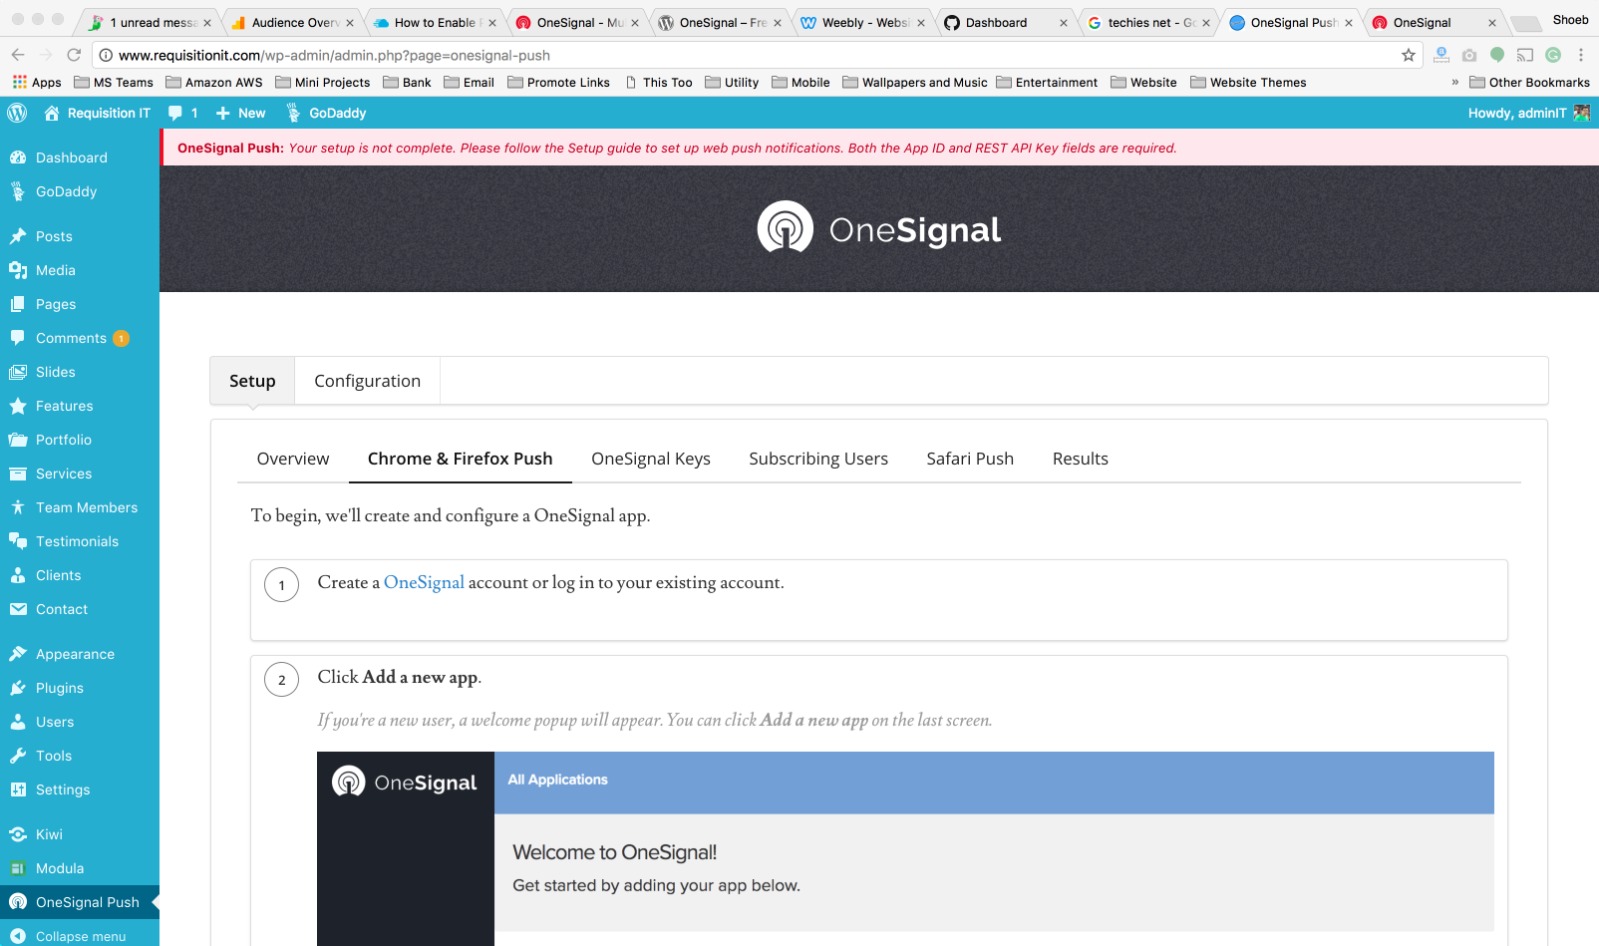
- Later click on “OneSignal Push” on the left pane >> Go to Setup >> Overview >> Chrome & Firefox Push
- First of all you need to create an account in “One Signal”. After successful registration, it will take you to OneSignal dashboard, where you need to add a new app. Click on Add a new app. It will ask the name of the application, name it accordingly. In my example, I’m calling it as “Testing Web Push”.
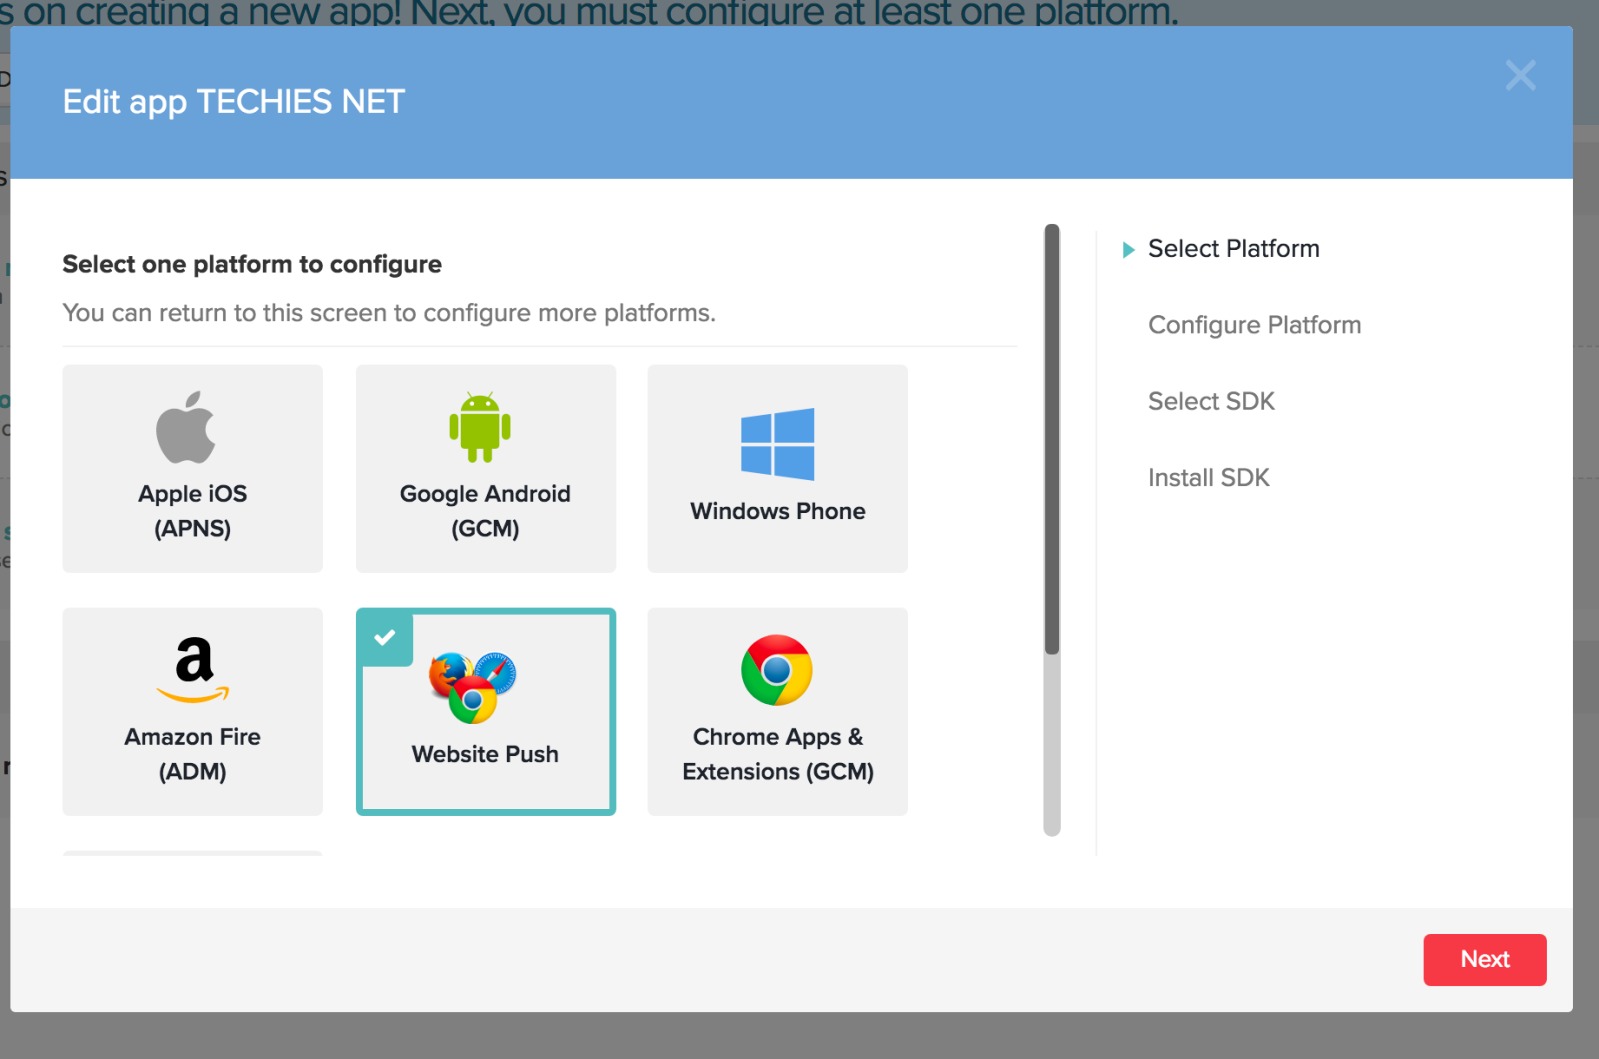
- One registration is completed you can proceed with creating of an app named "Techies Net".
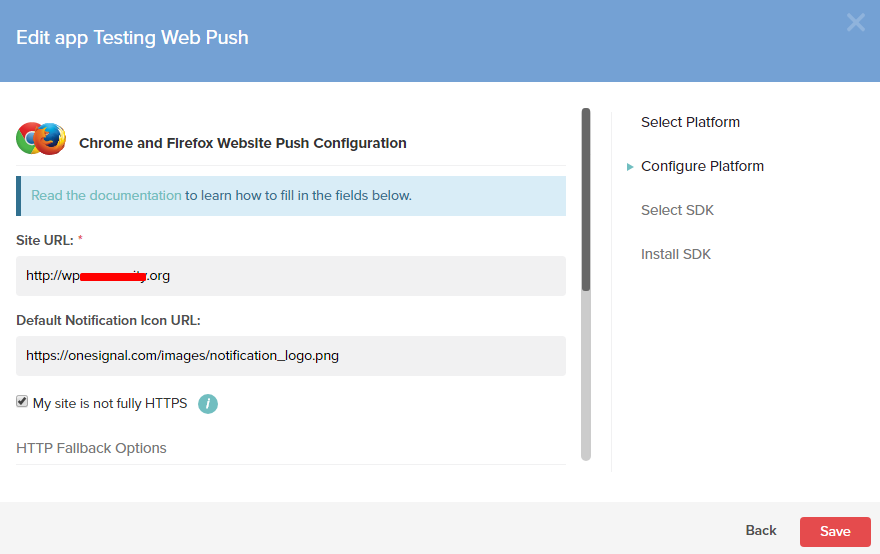
- Configure the Platform by entering your website URL with proper protocol (http:// or https://)
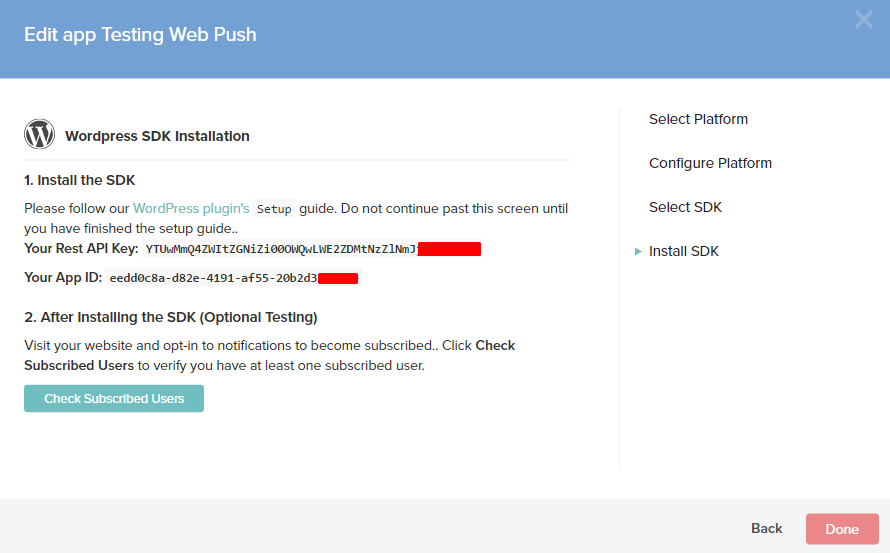
- Later select the WordPress as SDK and install it.
- After the installation is completed, it will generate a REST API Key and APP ID.
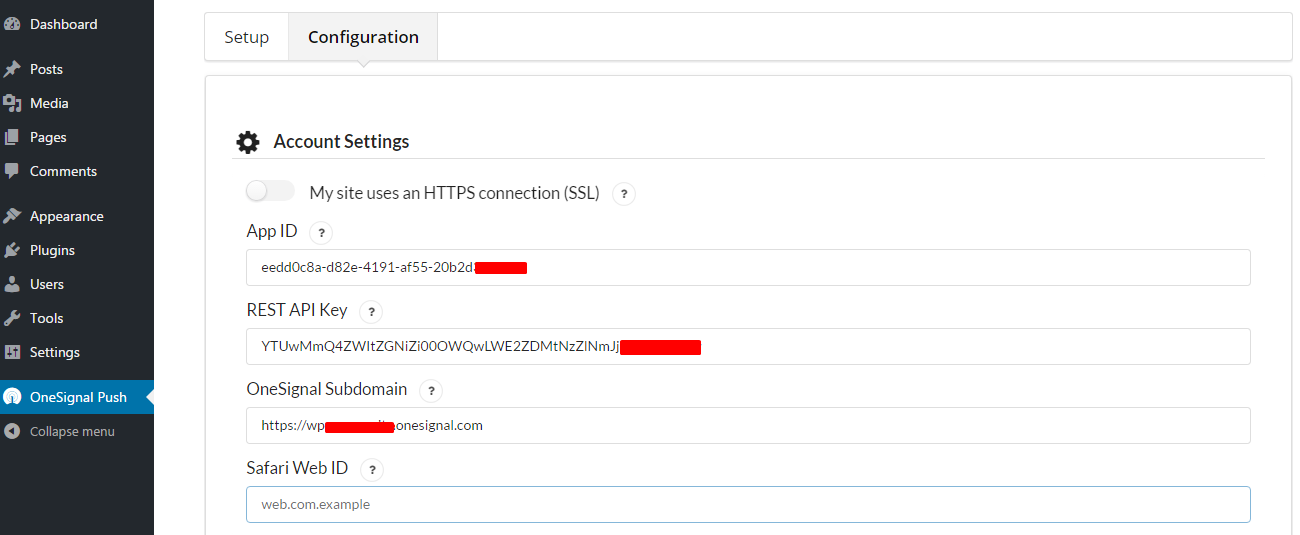
- Now, go to WordPress Admin Dashboard and navigate to One Signal >> Configuration, copy and paste above keys one by one in their respective text field and also enter the subdomain provided by OneSignal.
- Click on Save button and you are done with the setup.
Subscribe to Web Push Notifications
- After setting up, visit your website and you will see a notification icon at the right bottom of your site like the image below.
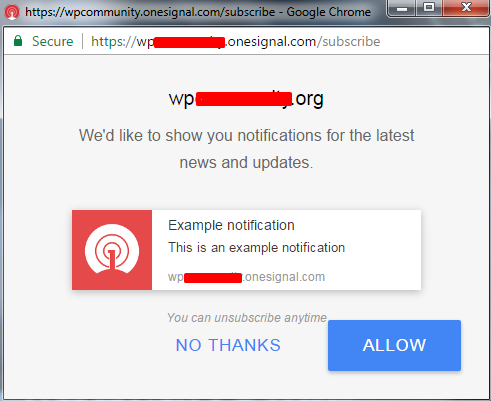
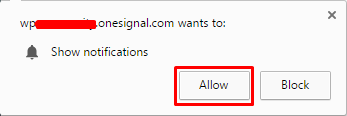
- Click on the icon to subscribe to web push notifications. It will open a new window asking to allow permissions for your subdomain to send push notifications. Click on the Allow button.
- You are done with the subscription and let us know your inputs on this plugin via comments.


